Migrating from Binance Chain to Binance Smart Chain
A guide for projects on how to migrate from BEP2 to BEP20

A guide for projects to allow token holders to swap freely between BEP2 & BEP20
Overview
Binance Smart Chain is an Ethereum Virtual Machine (EVM) compatible blockchain complete with bscscan.com, a chrome extension, an infura-like service as well as being suitable to be used with almost all Ethereum tooling, such as Truffle, Buidler, EthersJs, Web3Js and even Metamask.
It is extremely simple to deploy smart contracts on BSC, but in order to access the power of BSC, projects need to set up a BEP20 token contract to allow a 2-way token bridge between the two ecosystems. This guide will help most projects.
- Requirements: BC Account, BSC Account, Metamask, Remix, bnbcli
- Time: 1 hour
Any questions, please reach out to the Spartan team on telegram who worked closely with the Binance Chain team to make sure this guide was accurate.
Process Overview — 3 Simple Steps
Part 1 — Generating the Bind
- Token Owner deploys a BEP20 contract with totalSupply that *exactly* matches its BEP2 counter-part. The symbol should be identical to the prefix of the BEP2 symbol (ie. if BEP2 is “BTCB-1DE” then symbol should be “BTCB”) The decimals also must be 18.
- BEP2 Token Owner then binds the BEP20 contract with the BEP2 asset.
This now creates the asset on BSC and tells BC about it. The full supply of the BSC asset will be on the BEP20 Owner’s address.
Part 2 — Approving the Bind
- The BEP20 owner then approves the BSC TokenHub to spend an infinite supply.
- The BEP20 owner then approves the Bind on the TokenHub contract.
The full supply will now be moved into the TokenHub, ready to fulfil transfer requests by BEP2 owners.
Part 3 — Social Profile
- BEP20 Owner is to then update the social profile on BscScan to allow users to discover and be informed about their new BEP20 token.
Part 1 — Generating the Bind
1.1 Creating a BEP20 Token
Firstly, deploy the fixed-supply BEP20 token, making the appropriate edits. Use this template:
https://github.com/spartan-protocol/spartanswap-contracts/blob/master/contracts/BEP20.sol
constructor() public {

_name = 'Token Name';

_symbol = 'TKN';

_decimals = 18;

_totalSupply = 1*10**8 * 10**18; //100m

_balances[msg.sender] = _totalSupply;

emit Transfer(address(0), msg.sender, _totalSupply);

}
Note: totalSupply must exactly match the BEP2 counter-part. Symbol must match the prefix of the BEP2 symbol. Decimals of 18 is required. If the BEP2 counter-part is mintable, then use the BEP20Mintable Template.
https://github.com/spartan-protocol/bsc-contract-templates/blob/master/contracts/BEP20Mintable.sol
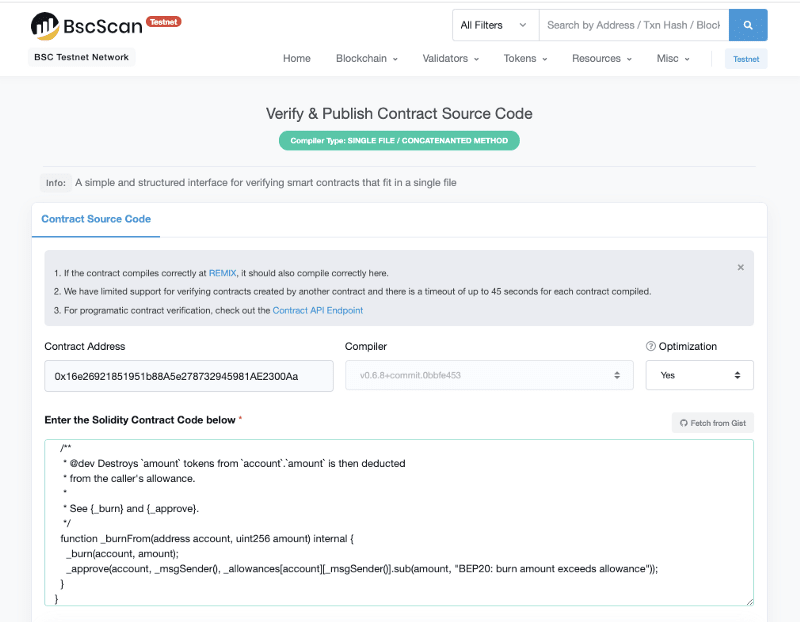
Deploying. Use Remix: https://remix.ethereum.org/
You should verify the contract by following the verification process on BSCScan.com
1.2 Binding the BEP2
The next part is to bind the two assets together.
Firstly, download the CLI binary (get the latest version, then download off github):
 binance-chain
Right-click, “open” and then close. This is enough to give your machine permissions to run the binary, or run from terminal: sudo chmod +x bnbcli
Run the CLI tool, import your original keys that minted the asset:
./bnbcli keys --recover owner
Then prepare the command to bind:
./bnbcli bridge bind --symbol <TKN-XXX> --amount 0 --expire-time 1599210729 --contract-decimals 18 --from owner --chain-id Binance-Chain-Tigris --contract-address 0x04180cF2aB6130C955508A0047ce1DFd6f52e6bf --node http://dataseed4.binance.org:80Note on parameters:
- Symbol is the BEP2 symbol
- Amount should be 0 which will specify 100% of the supply to be migrated
- Expire-time place 15 minutes into the future: https://www.epochconverter.com/
- Contract Address should be the BEP20 address
Part 2 — Approving the Bind
2.1 Approving the Tokenhub to spend.
Head to BSCScan, find the BEP20 contract and click “write contract” in order to approve TokenHub contract to spend an infinite supply (just use “-1”):
0x0000000000000000000000000000000000001008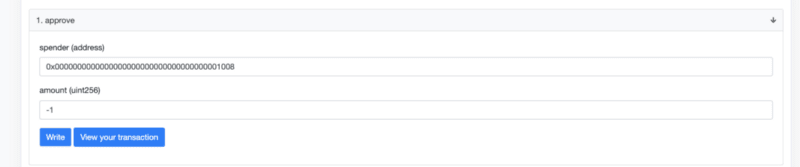
2.3 Approving the Bind
The BEP20 Owner can now approve the bind. This will transfer the full supply from their address into the TokenHub Contract.
https://bscscan.com/address/0x0000000000000000000000000000000000001008#writeContract
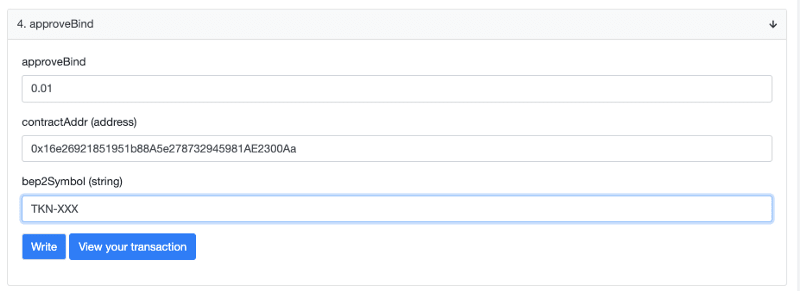
Note: you will need to pay the relay fee of 0.01 BNB.
Users can now use the Binance Chain Chrome extension to swap. (Guide separate).
Part 3 — Social Profile
The BEP20 Owner should then navigate to the Token’s page on BscScan and “Update Token Info”
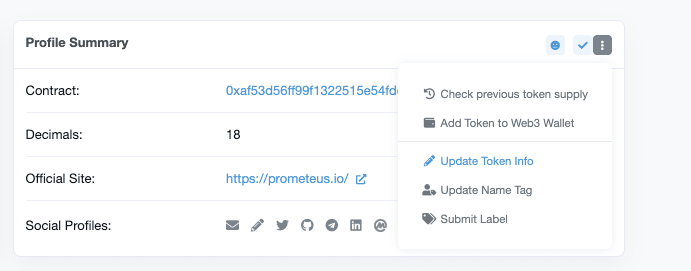
They will be taken to a Google Form where they can add information about their BEP20 (including a 32*32 logo) for verification. This will show their asset on the Tokens page and display an official logo.
The team member should use an official email address under the same domain as the listed website for the token.
Conclusion
Follow this guide to deploy a BEP20 contract, then bind it to its counter-part on BC. Token holders can then migrate across to access the full power of Smart Chain.